
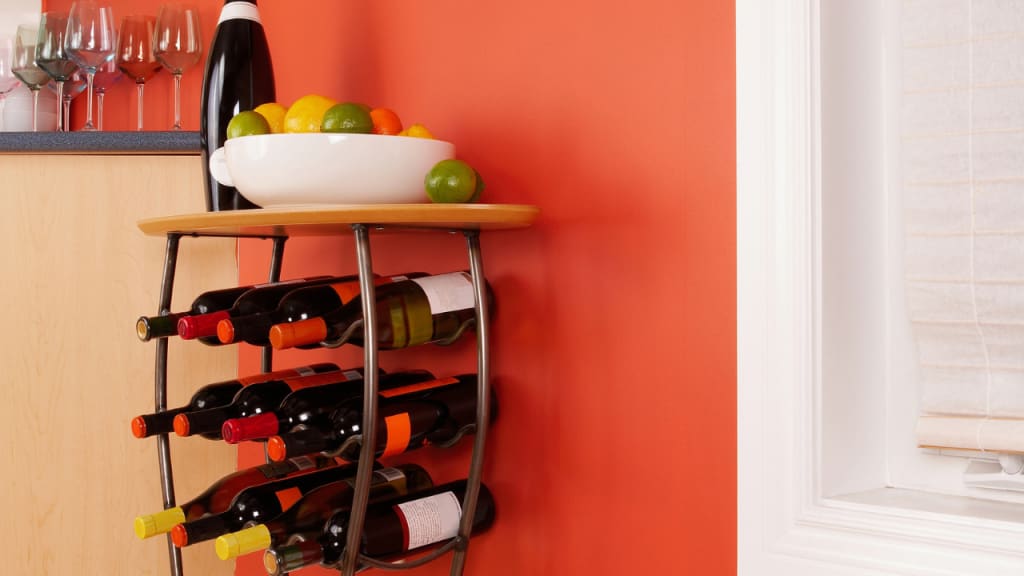
DIY Wine Rack – How To Build a Masterpiece For Your Home

So, you need a wood wine rack and want to try your hand at building it yourself?
Now that’s what I call a great idea!
Whether you’re in it for the money-saving aspect or just want to try a fun and creative project, it’s a great way to store those precious wine bottles in a wine rack. Plus, it’s a perfect excuse to flex your creative muscles and make something cool.
Now, I know what you’re thinking—it sounds a bit complicated. But with the right tools and a little bit of time, you can create an amazing wine rack in just a few days.
And hey, you can even invite some friends over to join in on the fun of building a simple DIY wine rack.

Maybe you only need a small wood wine rack to hold a few bottles, or perhaps you’re dreaming big and want a larger-scale modern wine rack. Who knows, you might even be looking for a temporary solution while you wait for your extravagant masterpiece, and the best part is, you don’t need to spend a fortune for your wine cellar to be built.
Whatever the reason, there’s no bad excuse to embark on a DIY wine rack adventure. Who needs a reason to get crafty and make something awesome, right?
The best part is that DIY wine racks are not as tough to make as they may seem. They can accommodate all kinds of wine bottles, and all you really need are some basic tools and a bit of wood. Just swing by your local hardware store, grab what you need, and spend a few hours (or even less) bringing your wine rack vision to life.
Before you jump into the project, though, there are a few things you should consider.
Table of Contents
Decide What Kind of Wine Rack You Want to Build

Building a DIY wine rack is a fantastic project, but you have to determine certain aspects beforehand so that you know the amount of materials you’ll need. It’s important to consider the ideal wine storage conditions before diving into the project. This way, you can select an appropriate design and identify a suitable space in your house to position the wine rack.
Size of the DIY Wine Rack
Before you start building your DIY wine rack, you should first decide on the scale at which you want to build it. Will it be a smaller or larger wine rack? How large do you want it to be, and how many bottles do you want it to accommodate? The size of the wine rack will determine its capacity to hold a specific number of wine bottles, with a larger wine rack offering more storage space compared to a smaller one.

Wine Storage & Temperature
Wine does best when it’s stored at around 50-55 degrees Fahrenheit. If you keep wine at a temperature lower or higher than this, you risk spoiling the wine and ruining its flavors and aromas. Before building a DIY wine rack, first make sure you have wine storage space in an area that isn’t too hot or cold.
Do not build your wine rack someplace warm like outside or near your oven and stove. Placing the wine rack in such areas will cause the wine to become warm and spoil when left unattended, which is certainly undesirable.
Wine Storage & Light
Consider the fact that wine fares better when it’s kept in a dark area. Some wines are very sensitive to UV light and can start degrading the second they’re exposed to it. This is the reason why wine cellars are usually underground. Ask yourself if you have a dark cool space you can put your wine rack for wine storage.
Make sure not to position your DIY wine rack in a place that gets a lot of exposure to sunlight like near a window, as this will hurt the wine more than it will help it. These questions all make a difference when it comes to building a quality wine rack.

Wine Rack Materials
When considering materials for your DIY wine rack, there are several options to choose from based on your desired aesthetics and availability.
Reclaimed barn wood is an excellent choice for those seeking a rustic look with character, as it adds a weathered and aged charm to the wine rack. Alternatively, utilizing scrap wood or scrap plywood can be a cost-effective and sustainable option, allowing you to repurpose materials while still achieving functionality.
If you prefer a rich and elegant finish, dark walnut is a popular choice, providing a sophisticated and timeless appeal. For a unique touch, incorporating manila rope as a decorative element can add a nautical or coastal flair to the wine rack. Additionally, repurposing an old dresser can be a creative and resourceful way to transform it into a wine rack, giving new life to an existing piece of furniture.
Consider these materials to bring your DIY wine rack vision to life, making it both functional and visually appealing.

Wine Bottle Positioning
When designing and building your wine rack, keep in mind that wine bottles should be kept in a sideways position rather than an upright position. This is to prevent dehydration of the cork.
If the wine cork is dehydrated, it will shrink up, which can increase the chances of oxygen getting inside the bottle which is bad for the wine. While a small amount of oxygen can be beneficial for wine, excessive amounts are not. Also, don’t make the mistake of storing your wine upright.
After you’ve considered all these things and answered all the necessary questions, you can get right to buying your supplies and building the DIY wine rack.
Materials You’ll Need
Here are the items you’ll need to create your DIY wine rack that can accommodate your entire wine collection:
Wood planks or plywood
These will serve as the main building material for constructing the wine rack, providing stability and structure.
Measuring tape
A must-have for accurately measuring the dimensions of the wine rack components, ensuring proper fitting and alignment.
Saw
Used to cut the wood planks or plywood into the desired sizes and shapes required for building the wine rack.
Sandpaper
Necessary for smoothing rough edges and surfaces of the wood, creating a polished finish and reducing the risk of splinters.
Wood Glue
Used to bond the different components of the wine rack together, providing strength and stability to the structure.
Drill
Required for creating holes or making adjustments in the wood pieces, allowing for secure assembly and attachment of the wine rack components.
Paint or Stain
Provides a decorative and protective finish to the wine rack, enhancing its appearance and safeguarding the wood from moisture or damage.

Building The DIY Wine Rack
After you buy all the materials, assemble them in one spot and start following the other steps for building the wine rack!
It might seem like a lot of trouble in the beginning when you have everything laid in front of you in a big pile, however, it isn’t that complicated to build your wine storage system. Just follow the directions and you’ll have a wine rack in no time.

Step 1
First determine what design you want for your DIY wine rack, as well as its dimensions. Think about which area of your home you can put the wine rack, and how many bottles you want to store inside of it.
These are all the questions you should ask yourself and answer before making your wine rack and after getting your supplies. You can have designs like a wall-mounted wine rack, a countertop wine rack, or a freestanding wine rack, among others. If you need ideas, you can look at sites online like Pinterest to get an idea of what you want your wine rack to be. (1)
Sketch out the design that you want and start taking the required measurements for the wine rack features and space.

Step 2
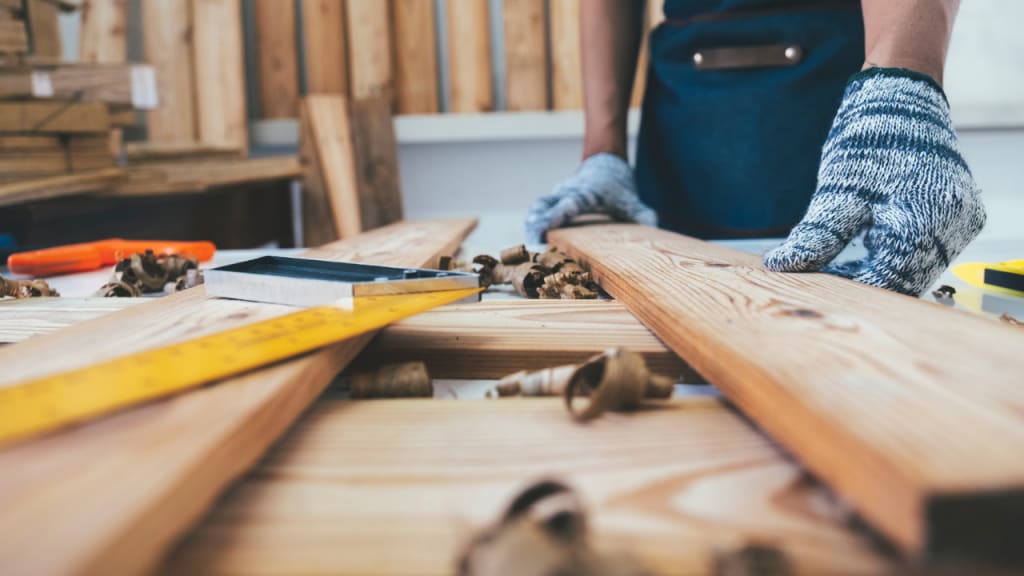
After you’ve determined the design you want to proceed with for the wine rack, and you’ve finished taking all your measurements, prepare the wood by sanding it which will ensure that it’s smooth and nobody will get a splinter while touching it.
After you’ve sanded the wood, measure and mark the dimensions onto it according to the design. You can use a pencil for this part.
Next, use the saw to carefully cut the pieces of wood to your desired length following the measurements. Make sure not to make any uneven cuts, so take your time with this one, and ask a friend for help if you need to. Slow and steady always wins the race!
Step 3
After you’ve made all the necessary cuts in the wood, all you need to do next is start assembling what’s supposed to be the DIY wine rack.
Attach the vertical and horizontal pieces using a drill and some screws, and consider using wood glue for more stability.
Check if the wine rack is properly aligned before proceeding. Step back and assess if it appears straight, and if possible, seek the opinion of a family member, friend, or partner who is present. Another option is to take a picture and check if the wine rack aligns with the grid.

Step 4
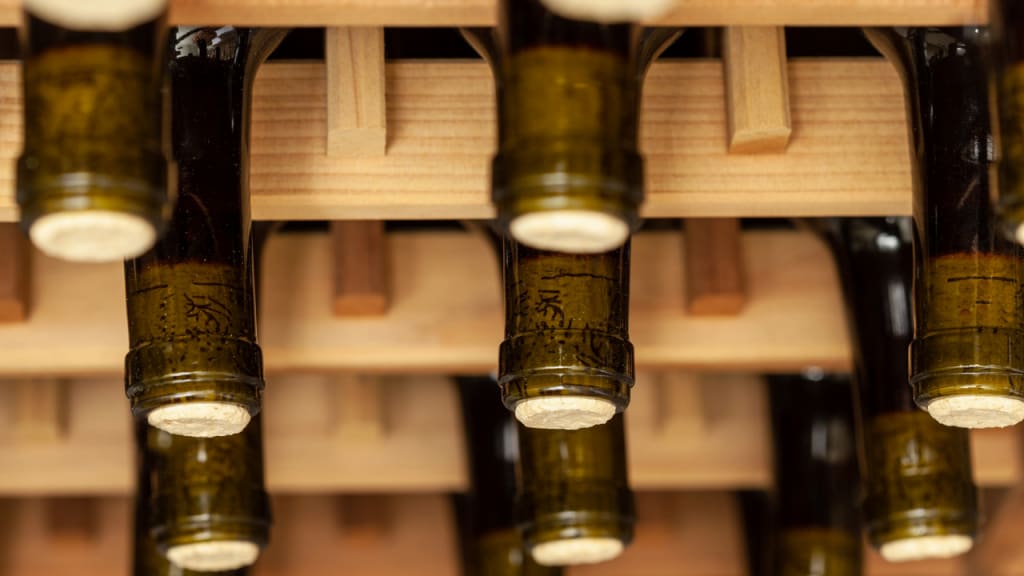
After the wine rack is deemed straight enough, insert bottle holders into it based on the design you decided to proceed with. For one of the more simple designs, you can just create holes in the horizontal pieces.
This is where you’ll put the bottles and this is where they’ll stay. To do this, you need to measure the diameter of your bottles and drill the appropriate size holes. Use a tape measurer to do this.
You could also just use pre-made bottle holders and wine rack inserts which are available at your local hardware store.

Step 5
Congratulations, your DIY wine rack is almost done! It just needs a few finishing touches.
What you need to do now is sand the entire wine rack to remove rough and uneven edges and also to get rid of any splinters you couldn’t get rid of before. Getting rid of splinters is a safety concern and sanding it down otherwise helps it look more refined. You could keep it uneven, but it’s recommended to use some sandpaper at this step.
After sanding the wine rack to ensure a smooth surface, you have the option to stain it if desired. Staining is not necessary, but it can enhance the overall appearance of the wine rack, giving it a more refined and appealing look compared to leaving it unstained.
Step 6
If you’ve chosen a wall-mounted DIY wine rack, you need to secure it to the wall now. You can identify the different studs on the wall and mark their locations. After doing this, use some screws to attach the wine rack to the studs in a way that ensures maximum stability.
Make sure the wine rack is level during this, you don’t want it to end up crooked in the last few steps and pose a hazard to your wine bottles!

Step 7
This is the final step, and fortunately, it is also the easiest. It is also incredibly rewarding.
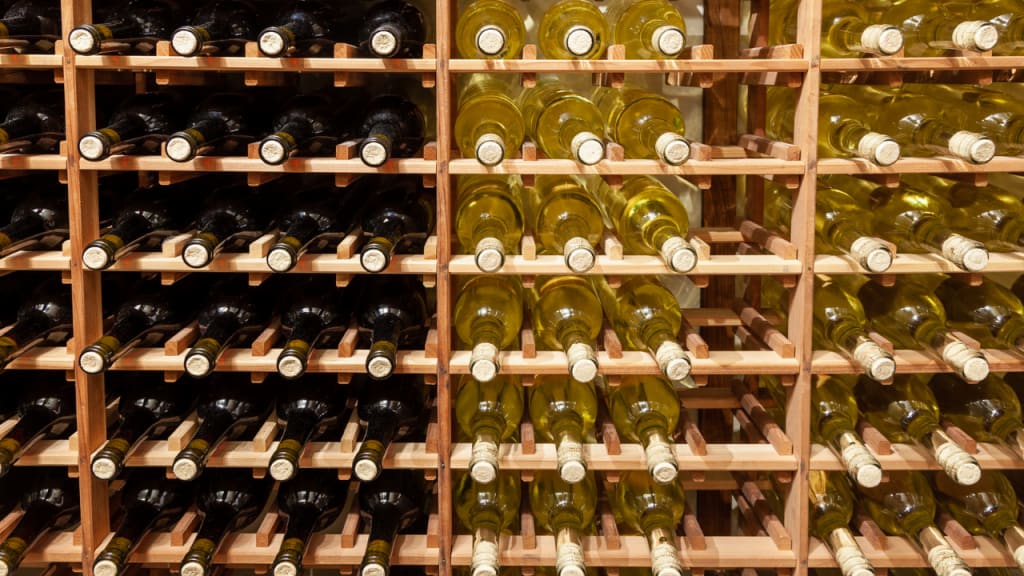
Once you have completed all the previous steps, it’s time to organize your wine bottles within the wine rack. Feel free to get creative and group the bottles in any way you prefer. Consider adding labels or tags to each bottle or slot for easy identification. You can organize the bottles by color, type, region, or any other criteria that suits your preference.
Take a moment to feel proud of yourself and admire the hard work you’ve put into reaching this point! Not everyone takes the initiative to create their own DIY wine rack.
Now, whenever you acquire more wine bottles, you have a dedicated wine rack to store them. You also have a functional piece of art that you can proudly showcase to your guests when they visit your home. If you decide to join a wine club, you now have a designated space to store your wine shipments.

Final Words
Building a DIY wine rack might initially appear daunting, especially if you’re new to it. It’s a project that requires some effort to construct successfully!
Many wine racks available on the market may seem complex and expensive to build and install.
However, not everyone has the financial means or resources to afford such wine racks. Building your own wine rack offers a cost-effective alternative to buying one and can be a fun and creative DIY project to undertake with friends. Although it may seem challenging at first, building a wine rack doesn’t require as much effort as you might think. With a few materials and a design in mind, you’ll be able to create one.
A DIY wine rack allows you to proudly display your wine bottles (or even your wine glasses) while adding a personal touch. It can also serve as a wonderful personalized gift for a family member or friend.
Moreover, there are numerous types of wine racks to choose from, whether it’s a DIY wooden wine rack, a modern wine rack, a small countertop wine rack, or even a leather wine rack. There’s something suitable for every wine collection. All it takes is a few tools and a few trips to the store to gather the necessary supplies.
Once your DIY wine rack is complete, take a moment to be proud of your accomplishment. Sit back, relax, and enjoy your creation while sipping on a glass (or two) of wine.
You’ve earned those wine glasses! If you feel inspired, you can always build another wine rack or help a friend with their own project. But for now, take the time to unwind and enjoy the fruits of your labor.
And if you are looking for a fancy layout, check out these luxury wine cellar design ideas.

- Should Prosecco Be Chilled? How Cold to Serve it? - February 11, 2024
- Should Zinfandel Be Chilled? Learn Why and When - February 11, 2024
- Can You Store Red and White Wines Together? Here’s Why - February 6, 2024


